Synchronizing NGINX Configuration in a Cluster
Overview
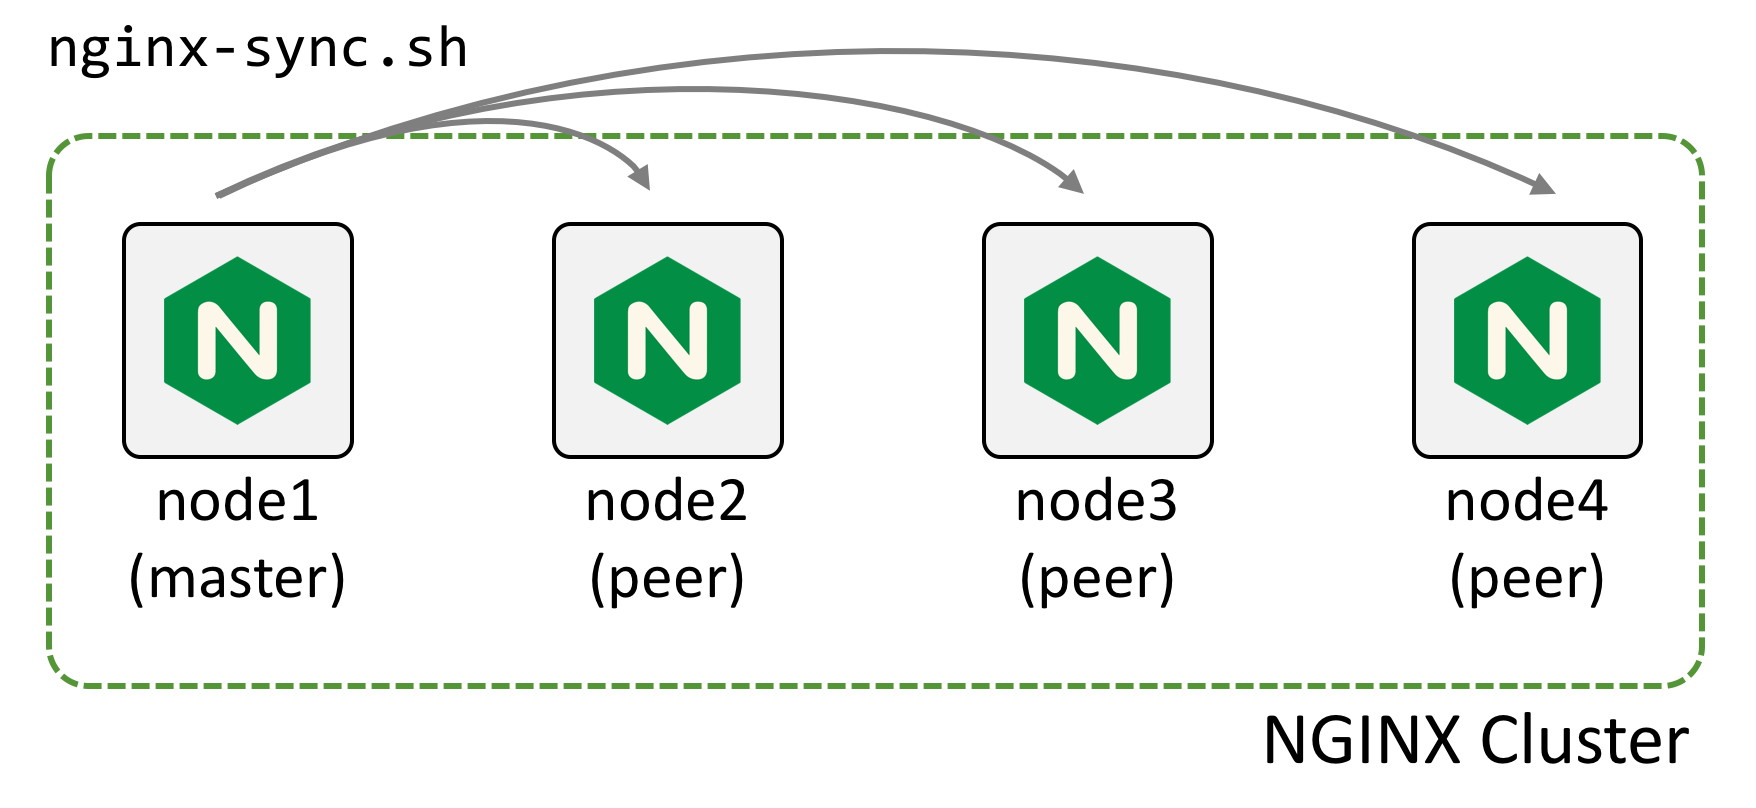
NGINX Plus is often deployed in an HA cluster of two or more devices. This new “Configuration Sharing” feature allows an administrator to push configuration from one machine in the cluster (the master) to its peers:
To configure this feature:
Install the
nginx-syncpackage on the master machineGrant the master machine ssh access as root to the peer machines
Create the configuration file
/etc/nginx-sync.confon the master machine:NODES="node2.example.com node3.example.com node4.example.com" CONFPATHS="/etc/nginx/nginx.conf /etc/nginx/conf.d" EXCLUDE="default.conf"
Run
nginx-sync.shon the master to push configuration inCONFPATHSto theNODES, omitting configuration files named inEXCLUDE.
nginx-sync.sh includes a number of safety checks:
- Verifies system prerequisites before proceeding
- Validates the local (master) configuration (
nginx -t) and exits if it fails - Creates remote backups of the remote configuration on each remote peer
- Pushes master configuration to the remote peer using rsync, validates configuration
remotely (nginx -t) and then reloads the remote nginx (service nginx reload). If any step fails, rolls back to the remote configuration backup
In detail
Install nginx-sync on the Master Machine
For RHEL or CentOS:
$ sudo yum install nginx-sync
For Ubuntu or Debian:
$ sudo apt-get install nginx-sync
Configure root SSH access to the peers
The goal of this step is to arrange that root on the master machine can ssh to the root account on each of the peers. This is necessary to rsync files to the peers and run local commands (test configuration, reload NGINX, etc).
On the master machine, generate an SSH authentication keypair for root and view the public part of the key:
$ sudo ssh-keygen -t rsa -b 2048
$ sudo cat /root/.ssh/id_rsa.pub
ssh-rsa AAAAB3Nz4rFgt...vgaD [email protected]
Get the IP address of the master node:
$ ip addr
1: lo: mtu 65536 qdisc noqueue state UNKNOWN group default
link/loopback 00:00:00:00:00:00 brd 00:00:00:00:00:00
inet 127.0.0.1/8 scope host lo
valid_lft forever preferred_lft forever
inet6 ::1/128 scope host
valid_lft forever preferred_lft forever
2: eth0: mtu 1500 qdisc pfifo_fast state UP group default qlen 1000
link/ether 52:54:00:34:6c:35 brd ff:ff:ff:ff:ff:ff
inet 192.168.1.2/24 brd 192.168.1.255 scope global eth0
valid_lft forever preferred_lft forever
inet6 fe80::5054:ff:fe34:6c35/64 scope link
valid_lft forever preferred_lft forever
Thus, the IP address in the example is 192.168.1.2
On each of the peer nodes, append the public key to root’s authorized_keys list. The from=192.168.1.2 prefix restricts access only to the IP address of the master node:
$ sudo mkdir /root/.ssh
$ sudo echo ‘from=”192.168.1.2" ssh-rsa AAAAB3Nz4rFgt...vgaD [email protected]' >> /root/.ssh/authorized_keys
Add
PermitRootLogin without-password
to /etc/ssh/sshd_config and reload sshd on all nodes but master to allow ssh key authentication:
$ sudo service ssh reload
Verify that the root account can ssh to each of the other nodes without providing a password:
$ sudo ssh [email protected] hostname
Create the nginx-sync.conf configuration file on the master
Create /etc/nginx-sync.conf:
NODES="node2.example.com node3.example.com node4.example.com"
CONFPATHS="/etc/nginx/nginx.conf /etc/nginx/conf.d"
EXCLUDE="default.conf"
Common Parameters
- NODES: a space or newline character separated list of the remote peers that should receive configuration
- CONFPATHS: a space or newline character separated list of files and directories that should be replicated from master to peers
- EXCLUDE: an optional space or newline character separated list of filenames of configuration files that should not be replicated
Advanced Parameters
POSTSYNC: a space separated list of file substitutions to be made on each remote node, in the format
‘filename|sed-expression’. The substitution is applied in place:sed -i'' sed-expression filename
For example:
POSTSYNC="/etc/keepalived/keepalived.conf|'s/192\.168\.2\.1/192.168.2.2/'"RSYNC: the location of the rsync binary, default
/usr/bin/rsyncNGINX: the location of the nginx-plus binary, default
/usr/sbin/nginxSSH: the location of the ssh binary, default
/usr/bin/sshDIFF: the location of diff, default
/usr/bin/diffLOCKFILE: the location of the lock file, used to ensure only one nginx-sync operation runs at a time, default
/tmp/nginx-sync.lockBACKUPDIR: the location of the remote backups, default
/var/lib/nginx-sync
Test your configuration
Please backup your configuration before testing.
- Run
nginx-sync.sh -hto display usage information. - Run
nginx-sync.sh -c node2.example.comto compare configuration between the master and the remote peer. - Run
nginx-sync.sh -Cto compare configuration between the master and all remote peers. - Run
nginx-sync.shto synchronize configuration and reload the remote NGINX peers.
Frequently Asked Questions
Why do I need to grant SSH access for root?
The NGINX master machine needs to be able to run commands remotely as the root user (e.g. service nginx reload), and needs to be able to update configuration files (for example, in /etc/nginx/) that are owned by root.
It may appear that granting root ssh is giving away too many privileges, but it is important to remember that any process that can write remote NGINX configuration and reload the remote NGINX process can subvert this process to gain remote root access to the server.
Therefore, you should consider that if a user gains root access on the master NGINX server, he also gains root access on the peer nodes in the cluster.
How do I replicate traffic if the master fails?
If the master fails, you can promote a peer to operate as master by following the installation instructions described above. This involves giving the new master SSH access to the remaining peers, and installing the nginx-sync.sh script and configuration file.
You can preconfigure several machines to operate in the master role. Please ensure that only one is used to replicate configuration at a time.
What happens if a node fails?
If a node fails, it will not receive configuration updates. nginx-sync.sh will return an error and continue to replicate the configuration to the remaining peers.
When the node recovers, it will have out-of-date configuration. You can display the configuration differences using nginx-sync.sh -c <node> -d:
$ nginx-sync.sh -c node2.example.com -d
...
diff -ru /tmp/localconf.1XrIqP7f/etc/nginx/conf.d/responder.conf /tmp/remoteconf.Xq5LWGKU/etc/nginx/conf.d/responder.conf
--- /tmp/localconf.1XrIqP7f/etc/nginx/conf.d/responder.conf    2016-12-07 10:29:36.988064021 -0800
+++ /tmp/remoteconf.Xq5LWGKU/etc/nginx/conf.d/responder.conf    2016-12-07 10:28:39.764066539 -0800
@@ -4,6 +4,6 @@
    listen 80;

    location / {
-        return 200 "Received request on $server_addr on host $hostname blue\n";
+        return 200 "Received request on $server_addr on host $hostname red\n";
    }
}

* Synchronization ended at Wed Dec 7 18:30:49 UTC 2016
The next time that you run nginx-sync.sh, the node will be updated with the current master configuration.